MIDI Mapping
Control FXCanvas from a physical MIDI controller. Map knobs, faders, buttons, and pads to almost any action in the app — trigger cues, select sources, ride global dimmer and effect parameters — using MIDI Learn, and get LED feedback back on your controller.
What is MIDI Mapping?
MIDI Mapping lets you use controllers like the Novation Launchpad, Akai APC40, or Korg nanoKONTROL to drive FXCanvas in real time. Incoming Note On/Off, Control Change (CC), and Program Change messages are bound to FXCanvas actions, and feedback can be sent back to light up pads and LEDs.
MIDI is one input into a unified control system. Keyboard shortcuts, MIDI, OSC, and the REST API all map to the same catalog of actions and are all configured in the same place — the Shortcuts settings tab. A mapping you create for a MIDI knob works exactly like a keyboard shortcut or an OSC message bound to the same action.
Key capabilities:
| Feature | Description |
|---|---|
| MIDI Learn | Bind a control by clicking an action, then moving the knob/fader/pad |
| Map almost anything | Global controls, cues, sources, palettes, and every source/effect parameter |
| Behavior modes | Choose how a control acts — passthrough, toggle, momentary, or step |
| Value scaling | Map a control's range onto the action's range (e.g. a fader to 0–360° hue) |
| MIDI feedback | Send LED state back to controllers (e.g. Launchpad, APC) |
| Controller profiles | Save a full set of mappings per controller and recall it instantly |
Overview: Two Steps
Setting up MIDI control is a two-step process across two settings tabs:
- Select your controller in Edit → Settings → MIDI (the Control Device).
- Create mappings in Edit → Settings → Shortcuts using MIDI Learn.
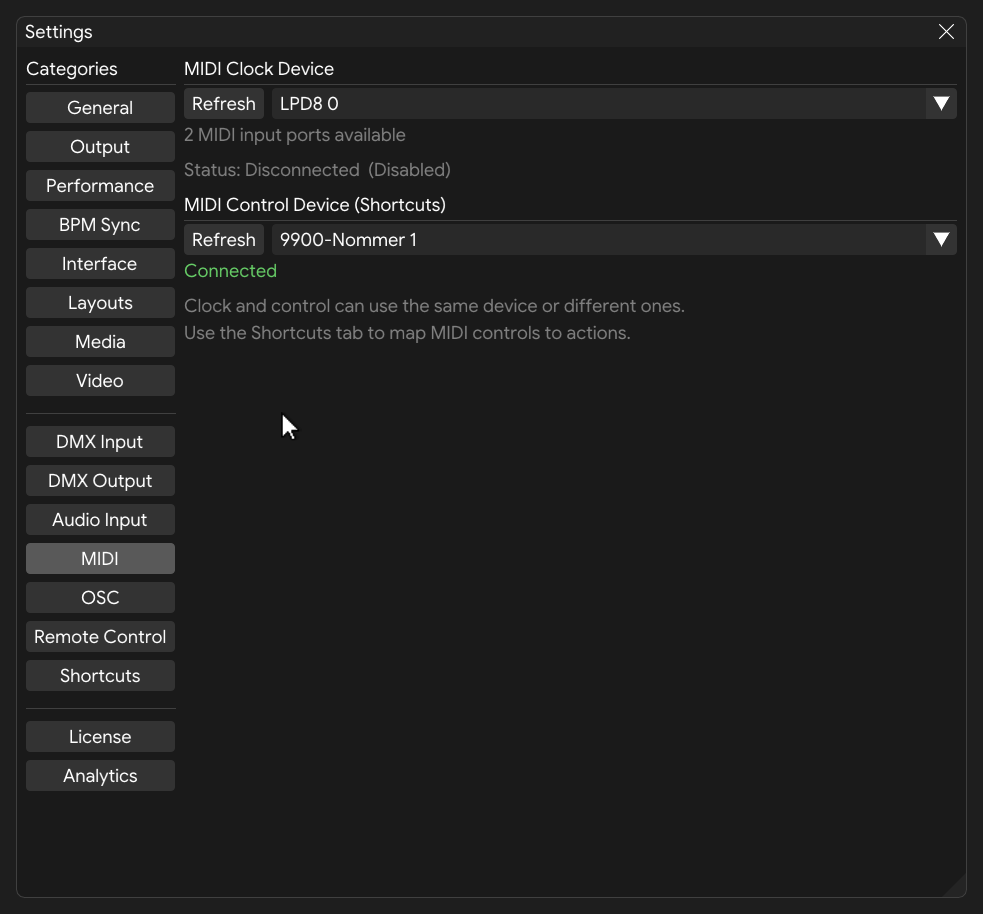
Step 1: Select a Control Device
- Open Edit → Settings (or press Ctrl+,)
- Select the MIDI tab in the sidebar
- Under MIDI Control Device (Shortcuts), click the dropdown and choose your controller
- The status line below shows Connected when the port is open
The MIDI tab has two independent device selectors:
| Selector | Purpose |
|---|---|
| MIDI Clock Device | Receives MIDI clock for tempo sync — see MIDI Clock |
| MIDI Control Device (Shortcuts) | Receives notes/CC/program-change messages for mapping |
The clock device and control device can be the same physical device or different ones. For example, you might receive clock from a DJ mixer while using a Launchpad for visual control. Choose None (Disconnected) to release a device, or click Refresh to re-scan for newly connected hardware.
If the control status shows "Port selected but not open," another application may be holding the port — close it and click Refresh.
Step 2: Map a Control (MIDI Learn)
MIDI mappings are created in the Shortcuts tab using a guided two-click flow.
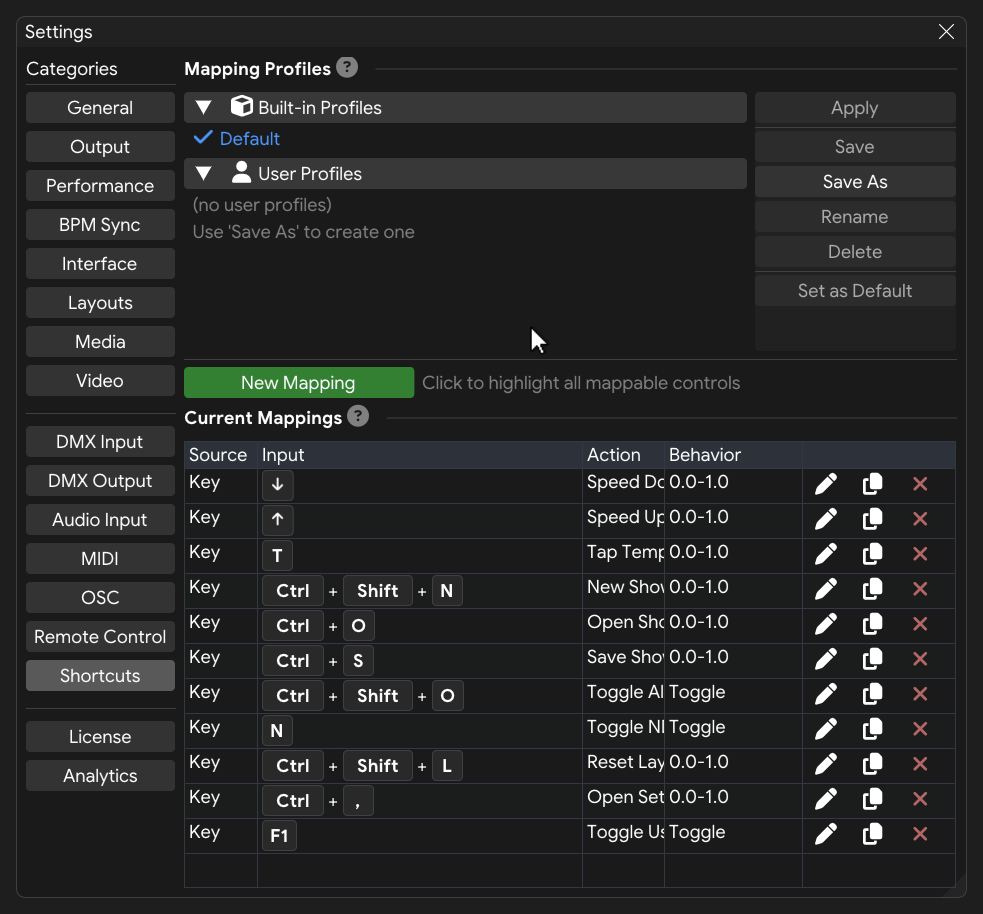
- Open Edit → Settings → Shortcuts
- Click New Mapping — every mappable control in the app is highlighted
- Select the action to control, either by:
- Clicking a highlighted control anywhere in the FXCanvas interface (for example, the Master Dimmer slider or an effect's parameter), or
- Picking an action from the list that appears in the Shortcuts tab, grouped by category
- Move the MIDI control you want to use — turn the knob, push the fader, or hit the pad
- The mapping is created and appears in the Current Mappings table
To stop without creating a mapping, click Cancel Mapping.
FXCanvas picks a sensible behavior automatically based on what you mapped — a CC knob on a continuous control becomes Passthrough (smooth), a pad on a toggle becomes Toggle, and so on. You can fine-tune this afterward (see Behaviors and Transforms).
The Current Mappings Table
Every binding in the active profile is listed in the Current Mappings table:
| Column | Description |
|---|---|
| Source | Where the input comes from — MIDI, Key, OSC, or REST |
| Input | The specific control (e.g. a CC number, a note, or a key combination) |
| Action | The FXCanvas action that gets triggered |
| Behavior | How the input value is interpreted (Toggle, Momentary, a value range, etc.) |
Each row has three buttons:
- Edit (pencil) — open the mapping in the Edit dialog
- Duplicate (copy) — create a copy you can re-bind to a different control
- Delete (✕) — remove the mapping
Behaviors and Transforms
Open a mapping with the Edit button to change how it behaves. The Edit dialog lets you re-bind the input, pick a different action, and shape how the control's value maps to the action.
Re-binding the input
Click Remap… and then press a key, move a MIDI control, or send an OSC message to capture a new input. Press Escape or Cancel to abort. If the input is already used elsewhere, a warning shows which other action it's bound to.
Behavior modes
The Behavior determines how an incoming value drives the action:
| Behavior | What it does | Best for |
|---|---|---|
| Passthrough | Sends the input value straight through | Knobs and faders driving continuous controls (dimmer, parameters) |
| Toggle | Each press flips between off and on | Pads/buttons for blackout, mirror, or effect enable |
| Momentary | On while held, off when released | Hold-to-activate looks (momentary blackout or strobe) |
| Step Up % | Each press bumps the value up by a set percentage | Nudging a parameter up from a button |
| Step Down % | Each press bumps the value down by a set percentage | Nudging a parameter down from a button |
The dialog only offers the behaviors that make sense for the action you mapped:
| Action type | Examples | Recommended behaviors |
|---|---|---|
| Continuous | Dimmer, hue, saturation, parameters | Passthrough, Toggle, Momentary, Step Up/Down |
| Toggle | Blackout, mirror, effect enable | Toggle, Momentary |
| Trigger | Tap tempo, go cue, select source | Momentary, Toggle |
| Discrete | Source / cue / palette by index | Toggle, Step Up/Down |
Value scaling
For continuous actions (and discrete actions when stepping) you can scale the control's range onto the action's range:
| Field | Description |
|---|---|
| Output Min / Output Max | The action's value range to map into — e.g. a fader to dimmer 0.0–1.0, or hue 0–360 |
| Step % | How far each press moves the value (Step Up/Down behaviors) |
| Invert | Reverse the range so the bottom of the fader is the top of the value (Passthrough only) |
If a button-style action fires twice per press, switch its behavior to Momentary or Toggle. Passthrough is meant for smooth knobs/faders and can re-fire on trigger-style actions.
Mappable Actions
Almost everything in FXCanvas can be mapped. Actions are grouped by category in the action picker:
| Category | What you can map |
|---|---|
| Global Controls | Master Dimmer, Hue Shift, Saturation, Blackout, Mirror H/V, Global Speed, Global Direction, Reset Canvas / Source |
| BPM | Tap Tempo, Speed Up (2×), Speed Down (0.5×) |
| Output | Toggle NDI Output, Toggle All Outputs |
| File | New Show, Open Show, Save Show |
| UI | Toggle User Guide, Open Settings, Reset Layout |
| Sources | Select a specific source, Select by Index, Next / Previous Source |
| Source Presets | Load a specific preset, Select by Index, Next / Previous Preset |
| Palettes | Select by Index, Next / Previous Palette |
| Cues | Go to a specific cue, Go by Index, Next / Previous Cue, Re-trigger Current |
| Source Parameters | Every parameter of the active source |
| Effects | Each effect's Enabled toggle and every parameter |
| Effect Selection | Add an effect by type, Toggle an effect by type |
| Effect Presets | Load a specific effect preset |
| Media Files | Select a specific file, Select by Index, Next / Previous Media |
Source-parameter, effect, cue, preset, and media actions are content-aware — they update as you add cues, switch the active source, or change the effects chain. A mapping to "the active source's Speed" follows whichever source is loaded.
MIDI Feedback
FXCanvas can send MIDI messages back to your controller for visual feedback on controllers that support it (e.g. Novation Launchpad, Akai APC series):
- Light up pads to show which cue or effect is active
- Reflect toggle states (blackout, mirror, NDI) on button LEDs
Feedback uses each action's current state, so a pad bound to a toggle lights up when that toggle is on.
Mapping Profiles
The top of the Shortcuts tab manages mapping profiles — complete sets of keyboard, MIDI, OSC, and REST bindings. This makes it easy to keep one profile per controller or per show.
| Button | Action |
|---|---|
| Apply | Load the selected profile (or double-click it in the list) |
| Save | Overwrite the selected user profile with the current mappings |
| Save As | Save the current mappings as a new profile |
| Rename / Delete | Manage your user profiles |
| Set as Default | Choose which profile loads automatically on startup |
The built-in Default profile holds the factory shortcuts and can always be re-applied. Built-in profiles can't be overwritten, renamed, or deleted — use Save As to capture your own.
Save a profile named after each controller you use (e.g. "Launchpad Mini," "nanoKONTROL2"). When you switch hardware, just apply the matching profile.
Troubleshooting
Controller Not Responding
- Verify the correct port is selected under MIDI Control Device (Shortcuts) in Settings → MIDI
- Confirm the status line shows Connected
- Open the Log Viewer (Tools → Log Viewer → MIDI) to see if messages are arriving
- Ensure no other software is holding the MIDI port exclusively
A Control Won't Bind
- Make sure you clicked New Mapping first — controls only highlight in mapping mode
- Some controllers send on a specific MIDI channel; FXCanvas accepts any channel by default
- For endless/relative encoders, a CC may not produce a clean 0–127 sweep — try an absolute knob or use a Step behavior
A Mapping Fires Twice
- Change the Behavior to Momentary or Toggle for button/pad-style controls (see Behaviors and Transforms)
No MIDI Devices Shown
- Ensure your MIDI device is connected via USB or a MIDI interface
- Click Refresh to re-scan ports
- On Windows: verify the device appears in Device Manager under "Sound, video and game controllers"
- On macOS: check the Audio MIDI Setup utility
Clock and Control on the Same Device
If your device sends both clock and control on one port, select it for both the Clock Device and the Control Device — FXCanvas handles both message types from a single port.
Tips and Best Practices
- Faders/knobs → Passthrough for smooth control of dimmer and parameters
- Pads → Toggle for blackout, mirror, and effect on/off
- Pads → Momentary when you want a control to be active only while held
Use one device for clock (e.g. a DJ mixer) and a different device for control (e.g. a Launchpad). This keeps tempo sync independent from your visual control surface.
Related Topics
- Keyboard Shortcuts — default shortcuts and customizing them in the same Shortcuts tab
- MIDI Clock — MIDI Clock tempo synchronization
- OSC API — OSC control from TouchOSC and other controllers
- REST API — HTTP control for Bitfocus Companion and Stream Deck