Video Playback
Play video and image files as sources alongside built-in shaders and live video inputs. FXCanvas scans folders you configure, indexes the media inside them, and lets you drop any clip straight into your visual chain — with tempo-synced looping, scrub controls, and hardware-accelerated decoding.
What Is Video Playback?
Video playback in FXCanvas uses the File Media system. You point FXCanvas at folders on your drive, it scans them for supported files, and those files show up in the Source Presets panel as selectable sources. When you activate one, it becomes the active source and runs through the effects chain and output mappings just like a shader.
Key capabilities:
- Video and image playback — Load video clips or still images as sources
- Folder-based media library — Configure folders to scan, organized by folder in the UI
- Hardware-accelerated decoding — Uses GPU decoders when available (NVDEC, AMF, QSV, D3D11 on Windows; VideoToolbox on macOS)
- Full transport controls — Play, pause, seek, loop, and set in/out loop ranges
- Variable speed — Playback from 0.25× to 4×
- Tempo sync — Lock video duration to a number of beats
- Audio-reactive playback — Modulate playback speed from audio levels
- Scale and flip — Fit, Fill, Stretch, or Center scaling, plus horizontal/vertical flip
- Asynchronous loading — Large videos load in the background without stalling playback
Supported Formats
FXCanvas supports the following file types out of the box:
| Type | Extensions |
|---|---|
| Video | .mp4, .mov, .avi, .mkv, .webm, .gif, .ts, .mxf |
| Image | .png, .jpg, .jpeg, .bmp |
Extension support says nothing about the codec inside. A .mp4 container might hold H.264, H.265, or AV1 video. H.264 and HEVC (H.265) in MP4/MOV are the most widely supported and are the best choice for reliable, hardware-accelerated playback.
HAP Codec
FXCanvas supports the HAP family of codecs — GPU-accelerated video codecs designed specifically for real-time playback in VJ and media server applications.
Why HAP is ideal for FXCanvas:
- All I-frame — Every frame is a complete image with no inter-frame dependencies. This means instant seeking to any point in the video with zero decode delay, which is critical for tempo-synced looping and live scrubbing.
- GPU-decoded — HAP frames are DXT/BCn compressed textures that upload directly to the GPU without CPU-side decompression. This keeps CPU usage near zero during playback.
- Predictable performance — Because every frame is the same size and independently decodable, there are no keyframe stalls or decode spikes. Playback stays smooth regardless of where you seek.
- Easy encoding — Tools like FFmpeg, Adobe Media Encoder, and AVF Batch Converter can encode HAP from any source video.
HAP variants:
| Variant | Best For |
|---|---|
| HAP | General use — good quality, fast decode |
| HAP Alpha | Content with transparency |
| HAP Q | Higher visual quality at the cost of larger files |
HAP files are significantly larger than H.264/H.265 because every frame is stored independently. A 1-minute 1080p HAP clip can be 1–4 GB depending on the variant. Use a fast SSD for smooth playback of HAP content.
Setting Up the Media Library
Before media can appear in the Source Presets panel, you need to configure at least one folder for FXCanvas to scan.
Adding a Media Folder
- Open Edit → Settings
- Select the Media tab in the sidebar
- Click Browse and choose a folder containing your video/image files, or type the path directly
- Enable Scan subfolders if you want nested directories included
- Click Add Folder
FXCanvas scans the folder in the background and indexes all supported files. Metadata (duration, resolution, framerate) is probed asynchronously so a large library stays responsive.

Managing Folders
In the Media settings tab you can:
- Enable / disable a folder temporarily without removing it
- Toggle recursive scanning per folder
- Remove a folder (files are de-indexed but not deleted from disk)
- Rescan to pick up new or changed files
Probed metadata is cached to disk between sessions, so subsequent launches don't re-probe files that haven't changed. The cache is keyed by file path — renaming or moving a file will trigger a fresh probe.
Loading a Media File
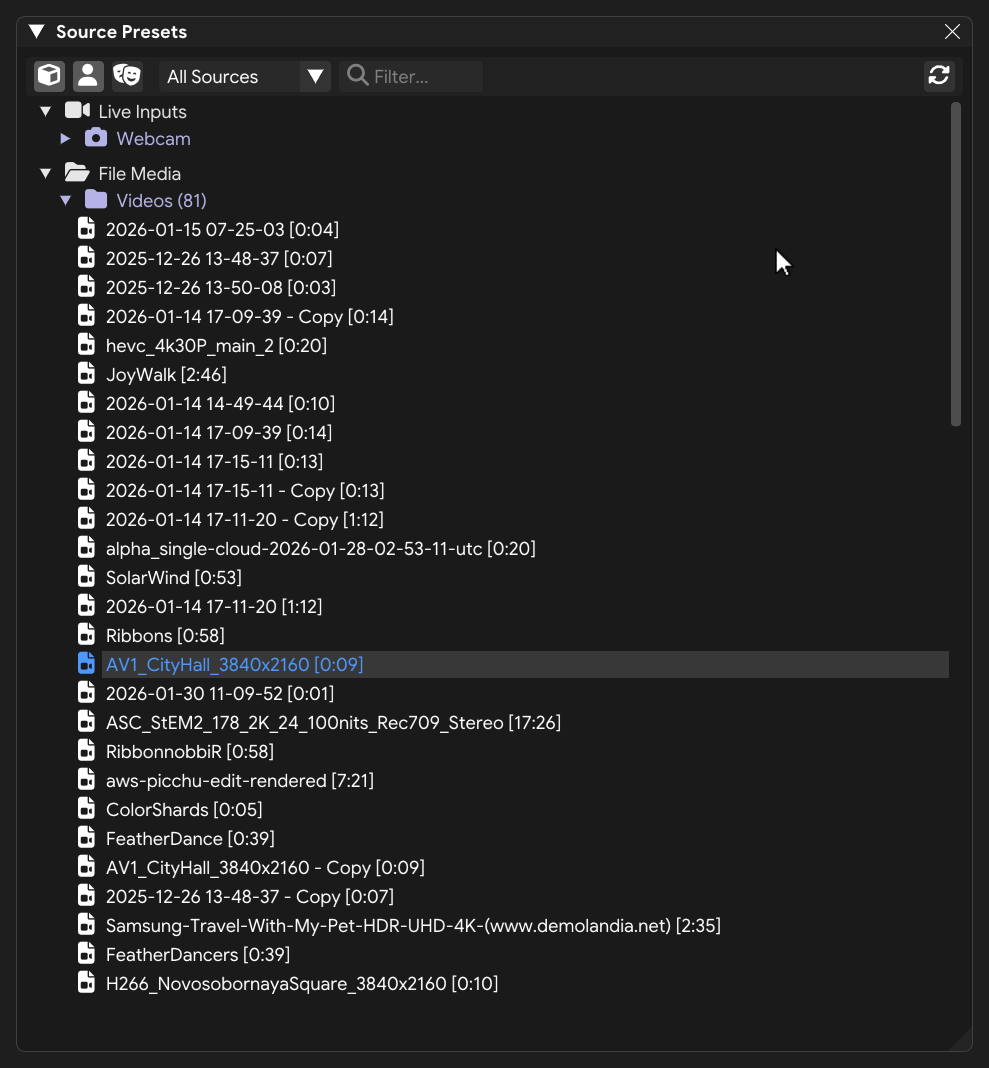
Once at least one folder is configured and scanned, your media appears in the Source Presets panel under a File Media section grouped by folder.
Browsing Media
- Open the Source Presets panel
- Expand the File Media section
- Expand a folder to see its files — videos are marked with a video icon, images with an image icon
- Files that couldn't be probed (unsupported codec, corrupt, inaccessible) are shown dimmed
Activating a File
Double-click any file to activate it as the current source. The file replaces whatever shader, video input, or other media was previously active, and flows through the effects chain to your outputs.
For videos, playback starts immediately. For images, the still is drawn and sized per the active scale mode.
Transport Controls
When a video file is active, the Source Parameters panel shows the full transport bar alongside standard source parameters.
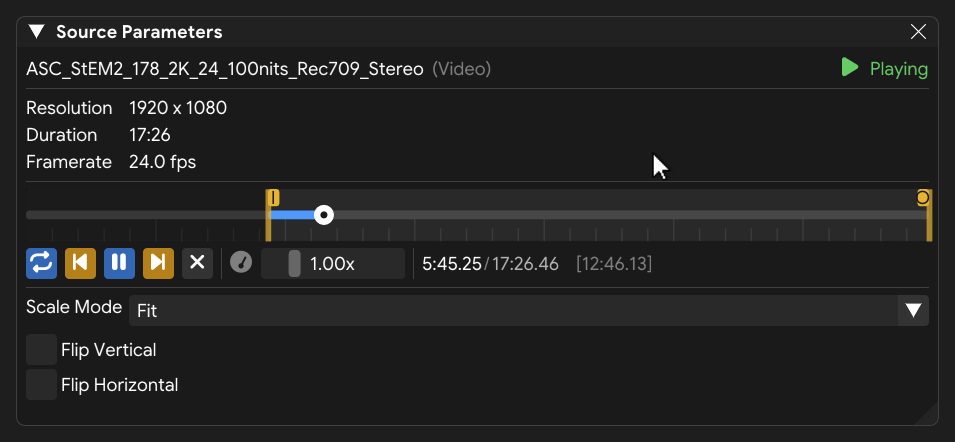
Timeline
The timeline shows the full duration of the clip with a scrubber and optional in/out range handles.
- Drag the scrubber — Seek to any position
- Drag a range handle — Set an in or out point for loop playback (handles live at the edges of the timeline by default)
- Click the track — Jump to a position
When a loop range is set, the unused portions of the timeline are visually dimmed and playback stays inside the range.
Transport Bar
| Control | Action |
|---|---|
| Play / Pause | Toggle playback |
| Loop toggle | Turn file looping on or off |
| Speed | Adjust playback speed from 0.25× to 4× |
| Time readout | Current position and total duration |
You can scrub while playback is running — release the scrubber and playback resumes from the new position at the current speed.
Scale Mode and Flip
Video and image sources often need to be fit to the canvas aspect ratio. FXCanvas provides four scale modes:
| Mode | Behavior |
|---|---|
| Fit | Scale to fit the canvas while preserving aspect ratio. Produces letterbox or pillarbox bars. |
| Fill | Scale to fill the canvas while preserving aspect ratio. Crops whichever edge overflows. |
| Stretch | Stretch to fully fill the canvas. Aspect ratio is not preserved. |
| Center | Draw at the source's native resolution centered on the canvas. No scaling. |
Flip controls:
- Flip Horizontal — Mirror the image left-to-right
- Flip Vertical — Mirror the image top-to-bottom
Flips are applied after scaling, so they work with any scale mode.
Sync Modes
Videos can play back in three different sync modes, selectable from the Source Parameters panel.
Manual
The default. You set the speed with the speed slider (0.25×–4×). Playback runs at a constant rate based on that value.
Use this for:
- Free-running video loops where timing isn't beat-critical
- Hand-tuned speed matches with a specific track
- Video content with its own internal tempo
Tempo
Playback speed is automatically adjusted so the full clip (or the active loop range) plays in a whole number of beats. Pick a beat division to control how many beats the clip spans:
| Beat Division | Meaning |
|---|---|
| 1 | Clip plays once per beat |
| 2 | Clip plays once every 2 beats |
| 4 | Clip plays once per bar (most common) |
| 8 | Clip plays once every 2 bars |
| 16 | Clip plays once every 4 bars |
Tempo sync requires an active BPM source (Internal tap tempo, Pioneer DJ, Ableton Link, MIDI Clock, or audio-based BPM detection). See BPM Sync for setup.
Tempo sync is perfect for video loops designed to match a musical bar. Combine a short loop range with a 4-beat division and the loop locks to the downbeat every bar.
Audio
Playback speed is modulated by live audio input levels. When the music is loud, the video plays faster. When it drops, so does playback speed. This creates energy-driven video reactivity.
Requires a connected audio input.
End Behavior
When looping is off and a video reaches its end, one of two things happens based on the End Behavior setting:
| Setting | Behavior |
|---|---|
| Hold Last Frame | The final frame stays on screen as a still |
| Go To Black | The output clears to black |
This is useful for cue-driven performances where a video plays once and leaves a deliberate visual state.
Hardware Decoding
FXCanvas automatically selects the best available hardware decoder for each video. Hardware decoding moves the heavy lifting onto the GPU, freeing CPU for everything else.
Windows Decoders
| Decoder | GPU Vendor | Notes |
|---|---|---|
| NVDEC | NVIDIA | Dedicated video decode hardware on GeForce/Quadro cards |
| AMF | AMD | Advanced Media Framework on Radeon cards |
| QSV | Intel | Quick Sync Video on Intel integrated and Arc GPUs |
| D3D11 | Any | Generic Direct3D 11 hardware decoding (multi-GPU aware) |
When you have multiple GPUs, D3D11 decoders are listed per device so you can target a specific card. Select the active decoder in Settings → Video.
macOS Decoders
| Decoder | Notes |
|---|---|
| VideoToolbox | Apple's unified hardware decode framework. Uses whatever acceleration the Mac exposes (Apple Silicon media engine, Intel Quick Sync, discrete GPU). |
Checking Active Decoder
With a video loaded, the Source Parameters panel (or Video settings) shows the currently active decoder along with:
- Decode FPS — Frames per second being delivered by the decoder
- Dropped frames — Count of frames the decoder couldn't keep up with
- Native framerate — The video's original framerate
If decode FPS consistently lags behind the native framerate, the decoder is struggling. See Troubleshooting below.
Tempo Sync and Loop Ranges
Loop ranges and tempo sync work together for precise musical video cues.
- Load a longer video clip
- Drag the in and out range handles to isolate a short section (a specific beat drop, a visual hit, etc.)
- Set Sync Mode to Tempo
- Pick a beat division that matches how many beats that range should last
Now the isolated section loops exactly on your beat grid, regardless of the clip's original framerate or the original tempo of the content.
Performance Tips
H.264 and HEVC (H.265) have universal hardware support on modern GPUs. Codecs like VP9 and AV1 have more variable support — they may fall back to software decoding on older hardware, which uses significantly more CPU.
Videos are typically rendered at your canvas resolution or the fixture grid resolution, which is usually far smaller than 4K source footage. If playback struggles with a 4K clip, re-export at 1080p or 720p — you'll get the same visual result with far less decode work.
For live performance, short video loops (2–8 seconds) with tempo sync are more responsive and forgiving than long clips. They start instantly and lock to the beat without seeking.
Only one file source is active at a time on the main source chain. To layer multiple video clips, use them on separate cue slots and swap between them.
Troubleshooting
File Doesn't Appear in the Library
- Check the file extension is in the supported list
- Verify the file is in a configured media folder (Settings → Media)
- Click the Refresh button in the Source Presets panel header to rescan
- Check the Log Viewer for scan errors
File Is Dimmed or Marked Unsupported
FXCanvas detected the file but couldn't decode it. Common causes:
- The codec inside the container isn't supported
- The file is corrupt or truncated
- The file was moved or renamed since it was last scanned
Try opening the file in another player to confirm it plays, then rescan the folder.
Video Plays But Looks Choppy
- Check decode FPS vs. native framerate — if decode FPS is lower, the decoder is struggling
- Try a different hardware decoder in Settings → Video
- Reduce the video's resolution or convert to H.264 baseline profile for wider compatibility
- Close other GPU-intensive applications
Audio From the Video Plays Through My Speakers
FXCanvas is a visual tool — it doesn't route audio. Video files decode video only; the audio track is ignored. If you hear audio, it's coming from something else (the video file opened in another app, or a system sound).
Tempo Sync Doesn't Lock
- Verify an active BPM source is set in the BPM Sync panel
- Check the displayed BPM is reasonable for your content
- The clip must be a reasonable length for the chosen beat division — a 10-second clip at 1 beat/clip would require 6 BPM
MXF Files Won't Play
MXF support uses a specialized code path to work around issues in standard MXF decoding. Some MXF variants (especially with unusual codecs or wrapping) may still fail. Convert to .mov or .mp4 for most reliable playback.
Related Topics
- Sources — Built-in shader-based visual sources
- Video Inputs — Live video from webcams, NDI, Spout/Syphon, and DeckLink
- BPM Sync — Tempo source setup for tempo-synced playback
- Audio Input — Audio input for audio-reactive playback speed
- Effects — Post-processing applied to video playback
- Shows and Cues — Trigger video cues from the cue system