Outputs
FXCanvas can send your visual content to several destinations at the same time. You can stream over your network, share textures between applications, output directly to a display, or feed professional SDI/HDMI hardware. The output system covers each of these setups.
What Are Outputs?
Outputs are the destinations for your rendered visuals. The render canvas is your main creative surface. Each output captures a region of this canvas and sends it to a destination.
Key concepts:
- Render canvas — The master surface where all your sources and effects render
- Output mapping — Each output samples a rectangular region from the render canvas
- Multiple destinations — Send the same visuals to different places at the same time
- Independent settings — Each output can have its own resolution and its own settings
Output Types
FXCanvas supports five output types, each one for a different use:
| Type | Platform | Description | Best For |
|---|---|---|---|
| NDI | All | Stream video over your local network | Broadcast workflows, distributed setups, LED walls |
| Spout | Windows | Share textures between Windows applications | VJ setups, single-computer workflows |
| Syphon | macOS | Share textures between macOS applications | VJ setups, single-computer workflows on Mac |
| Display | All | Output directly to a monitor or projector | Projection mapping, direct LED connections |
| DeckLink | Windows, macOS | Output to Blackmagic SDI/HDMI hardware | Broadcast, professional SDI/HDMI delivery |
NDI (Network Device Interface)
With NDI you can stream video over your local network to any NDI-compatible software or device.
Use cases:
- Capture in OBS for a stream or a recording
- Feed LED walls through media servers
- Send to lighting consoles for pixel mapping
- Share with other computers on your network
How it works:
When you enable NDI, FXCanvas broadcasts video streams. Any NDI receiver on your network can find them and use them. Each NDI output appears as a separate source in the receiving software.
Advantages:
- Works across different computers on the same network
- An industry-standard protocol with support in many professional tools
- Low latency for live performance
- No extra hardware is necessary
NDI works best over wired Ethernet connections. Use Gigabit networking for HD streams. Use 10GbE for several 4K streams. Do not use WiFi, because it is not reliable.
Spout
With Spout you can share textures very fast between applications on the same Windows computer. Spout shares GPU textures directly. It does not encode or transmit video.
Use cases:
- Send to Resolume Arena/Avenue for mixing
- Feed TouchDesigner for more processing
- Capture in OBS (with the Spout plugin)
- Combine with other Spout-compatible VJ software
How it works:
Spout uses DirectX shared textures to move images between applications. It does not copy the pixels through system memory. The result is near-zero latency and minimal CPU use.
Advantages:
- Ultra-low latency (GPU-to-GPU transfer)
- Minimal performance overhead
- No network setup is necessary
- Works with many Windows creative applications
Spout is a Windows-only technology. It does not appear as an option on other platforms.
Syphon
Syphon is the macOS equivalent of Spout. It shares textures fast between applications on the same Mac. Like Spout, it shares GPU textures directly, with no encoding overhead.
Use cases:
- Send to Resolume, VDMX, or MadMapper for mixing
- Feed Processing or another Syphon-compatible creative tool
- Combine with macOS-based VJ and media server workflows
How it works:
Syphon uses IOSurface-backed textures to share frames between applications through the GPU. This prevents pixel copies on the CPU. Texture sharing then has low latency and high performance.
Advantages:
- Low latency GPU-to-GPU transfer
- Minimal performance overhead
- No network setup is necessary
- Support in many macOS creative applications
Syphon is a macOS-only technology. On Windows, Spout gives the same function.
Display
Display output sends video directly to a monitor, projector, or LED wall that is connected to your computer.
Use cases:
- Projection mapping onto surfaces
- Direct connection to LED processors
- Preview on secondary monitors
- Fullscreen output for installations
How it works:
FXCanvas makes a separate window on the display that you select. It then renders the output region into that window. You can run the window fullscreen, or in a resizable window mode.
Advantages:
- Direct output with no intermediate software
- Works with any connected display
- Supports fullscreen mode and windowed mode
- No extra software or drivers are necessary
DeckLink Pro
DeckLink output sends your visuals to a Blackmagic Design DeckLink device over SDI or HDMI. The devices include UltraStudio, DeckLink, and similar capture/playback cards. Use this output to deliver a clean signal to broadcast switchers, professional monitors, and SDI/HDMI infrastructure.
Use cases:
- Feed a broadcast switcher or production hardware over SDI
- Drive a professional reference monitor or projector over SDI/HDMI
- Combine FXCanvas with an existing SDI plant
- Deliver to LED processors that take an SDI/HDMI input
How it works:
FXCanvas scales the output region to the selected device mode. It then sends the frames to the DeckLink device through the hardware pipeline of the device. The output has the exact resolution and frame rate of the selected mode. FXCanvas paces the frame delivery to the output rate of the mode, independent of your render frame rate.
Requirements:
- A Blackmagic DeckLink device connected to your computer
- The Blackmagic Desktop Video drivers on your computer (the DeckLink option appears only when FXCanvas detects a device)
- Windows or macOS
Advantages:
- Professional SDI/HDMI delivery with no intermediate software
- Locked, broadcast-standard output modes and frame rates
- You can select each device on a multi-output card
DeckLink output needs the Blackmagic Desktop Video drivers. If the drivers are absent, or if FXCanvas detects no DeckLink device, the DeckLink option does not appear in the output type list. Desktop Video is available on the Blackmagic website. After you install it and connect your device, the refresh control scans again.
On a card with several outputs, such as the DeckLink Quad 2, each output is a separate entry in the device picker. Some cards report the same name for every output. FXCanvas then labels the entries individually, for example "DeckLink Quad 2 (Output 1)" and "(Output 2)". You can therefore target a specific connector.
Output Mapping Editor
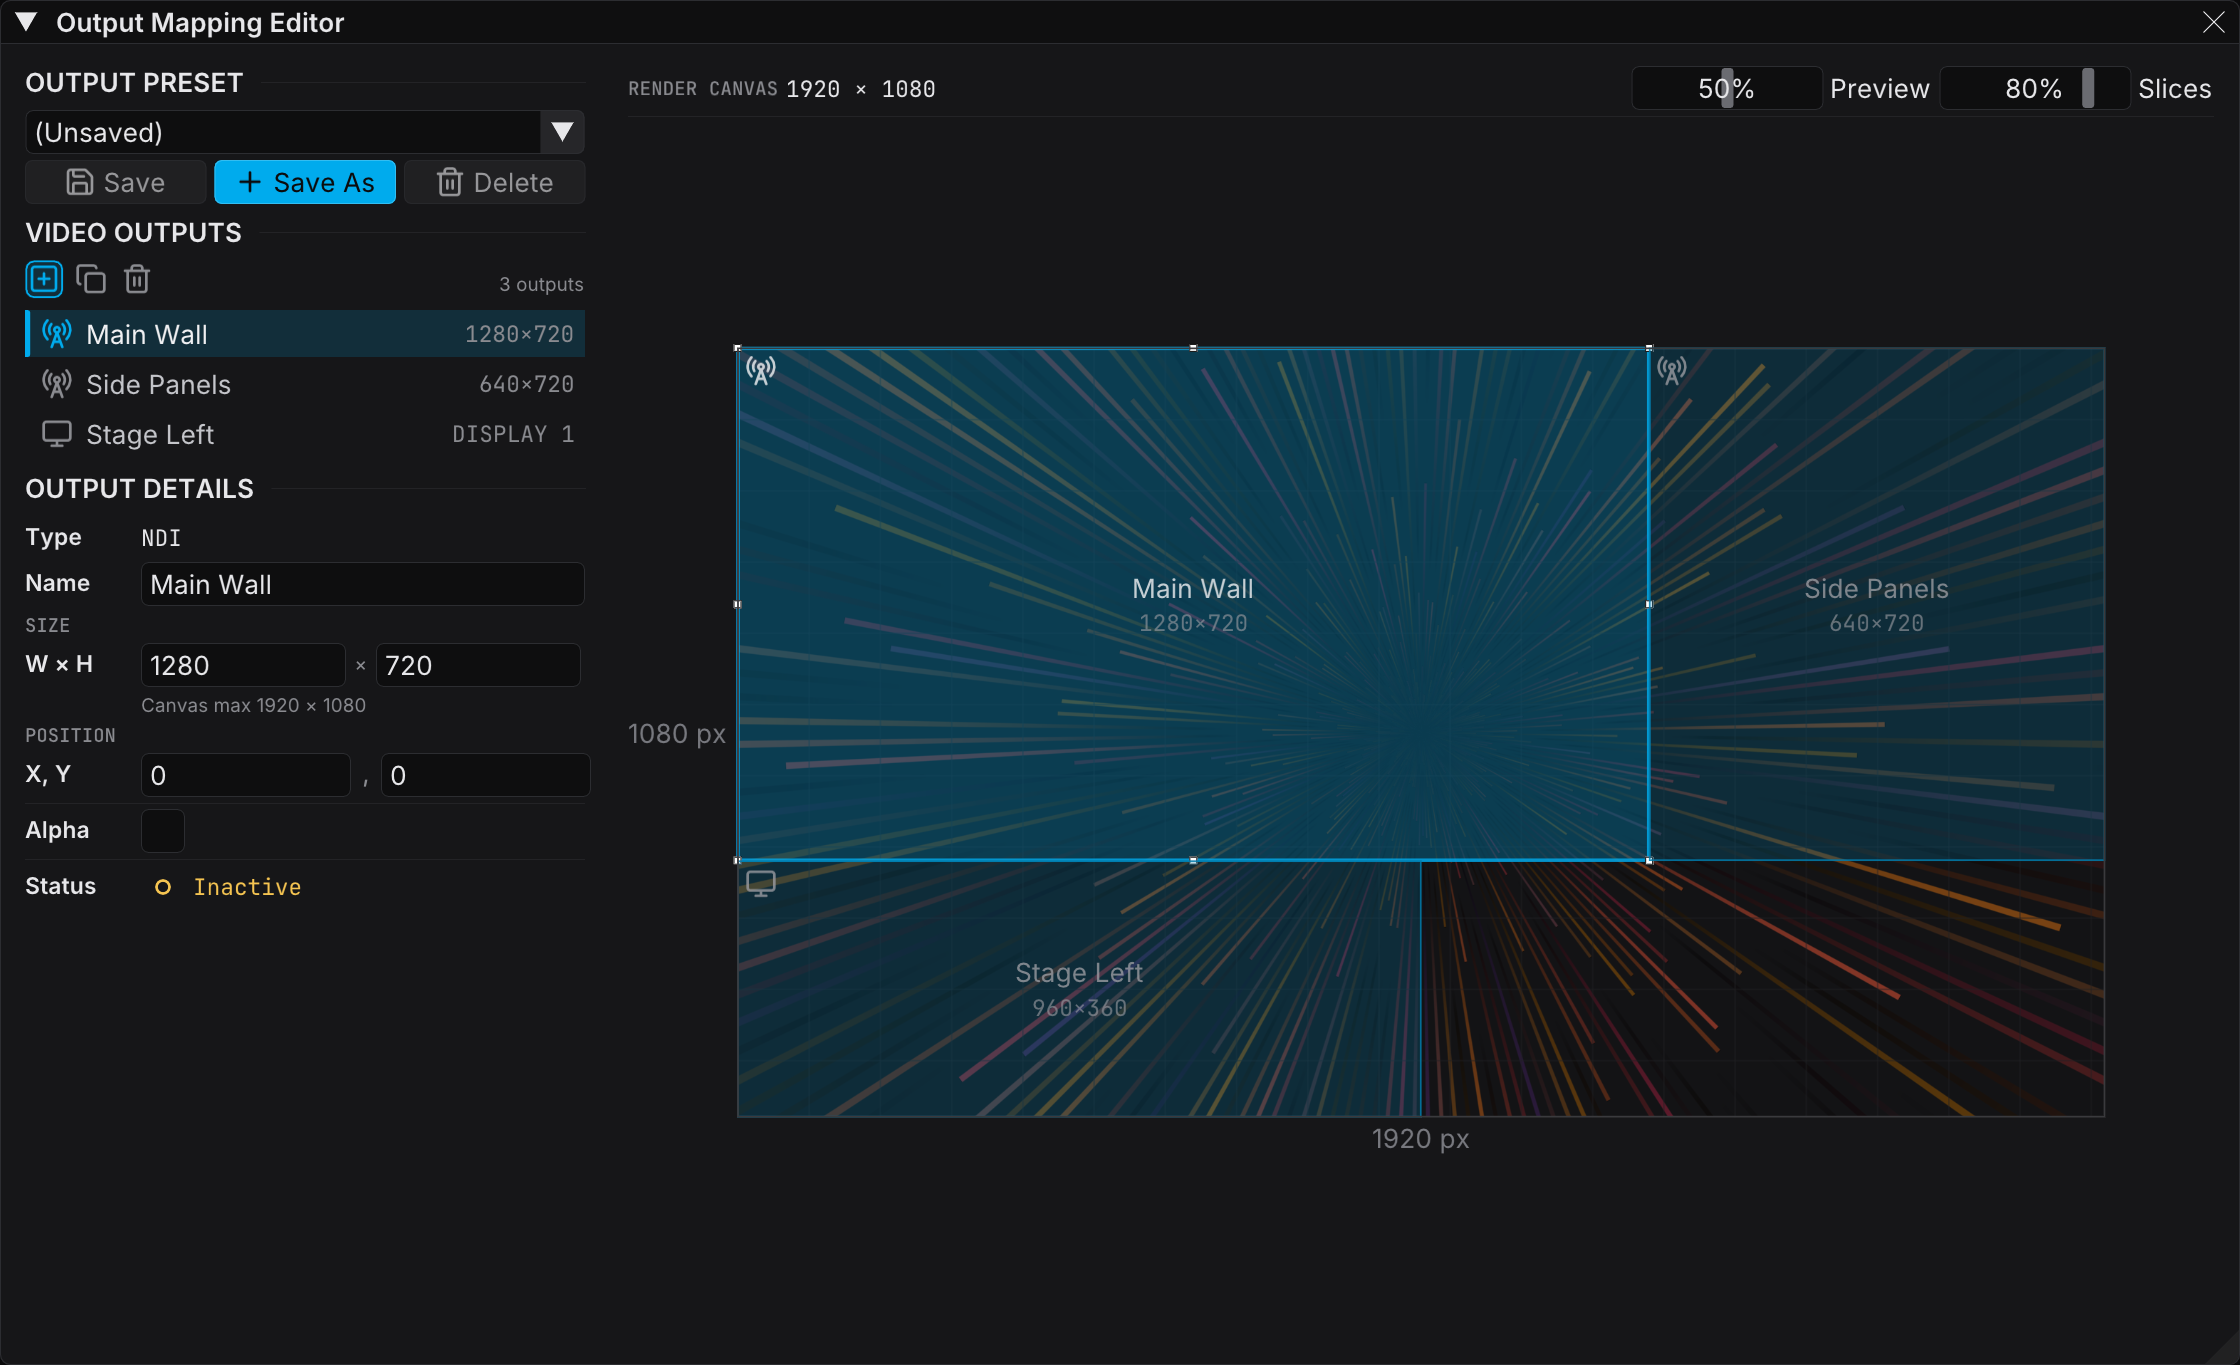
The Output Mapping Editor is your visual workspace for the outputs. It shows how your outputs map onto the render canvas. In the editor you can position, resize, and manage them.
Opening the Editor
Open the Output Mapping Editor in one of two ways:
- Menu: View → Panels → Output Mapping
- Settings: Click "Open Mapping Editor" in the Output settings tab
Understanding the Canvas View
The editor shows a scaled view of your render canvas:
| Element | Description |
|---|---|
| Canvas area | Gray background with the full render resolution |
| Output rectangles | Colored boxes that show where each output samples from |
| Grid lines | Reference grid at 100-pixel intervals |
| Labels | Each output shows its name and its resolution |
Visual indicators:
| Visual | Meaning |
|---|---|
| Translucent blue fill | Output region |
| Dim blue border | Unselected output |
| Bright blue border + white handles | The selected output |
| Type icon (top-left of the rectangle) | NDI, Spout, Syphon, Display, or DeckLink indicator |
Use the Preview and Slices sliders at the top of the canvas. They fade the background preview and the output rectangles separately. This helps when you align a region with the actual content.
Creating Outputs
To add a new output:
- Click the + button in the Video Outputs header
- Select the output type (NDI, Spout, Syphon, Display, or DeckLink)
- Set the output settings:
- Name — A descriptive name (it appears in the receiving software for NDI/Spout)
- Resolution — Width and height in pixels (DeckLink uses a fixed, mode-driven resolution instead)
- Position — Where on the canvas this output samples from
- Type-specific settings, such as the display selection, the DeckLink device and mode, and the alpha channel
- Click Add to make the output
If that output type is active, the new output appears on the canvas and starts to send immediately.
Without a license you can run two outputs at the same time, and the + button turns gray at that point. If you open a show with more outputs, FXCanvas loads the extra outputs disabled and keeps their settings. DeckLink outputs always need a license, at any count. See What requires a license.
Positioning Outputs
Drag to reposition:
- Click and hold an output rectangle
- Drag it to the position that you want
- Release the button to place it
Resize with the handles:
- Click an output to select it
- Drag a corner handle or an edge handle to resize it
- The output resolution updates to match
Precise positioning:
- Select an output
- Edit the X, Y, Width, and Height values in the details panel
- The values update immediately
Understanding Output Regions
Each output samples a rectangular region from your render canvas:
- Position (X, Y) — The top-left corner of the region on the canvas (0,0 is top-left)
- Resolution (Width × Height) — The size of the captured region in pixels
You can:
- Overlap two outputs, so both capture the same area
- Cover different areas with different outputs (split screen)
- Use one large output for the whole canvas
- Mix different resolutions and positions
- Single output: One output at the canvas resolution
- Side by side: Two outputs, each one over half the canvas
- Picture in picture: A small output over a larger one
- Multi-display: Different regions for different physical displays
Managing Outputs
Output List
The left side of the Mapping Editor lists every output:
- Each row shows the type icon, the name, and the resolution of the output. For a Display output the row shows the target monitor number
- Click an output to select it. An accent bar marks the selected row
- The details of the selected output appear in the panel below
- The row buttons above the list add, duplicate, and delete outputs. Duplicate and delete act on the current selection
- The Status field in the details panel shows whether the output is active
Editing Output Properties
After you select an output, you can change its properties in the details panel:
| Property | Description |
|---|---|
| Name | The identifier in the receiving software |
| Type | NDI, Spout, Syphon, Display, or DeckLink (you cannot change this after creation) |
| Resolution | The output dimensions in pixels |
| Position | The X, Y mapping coordinates on the canvas |
| Alpha | Include the transparency channel (NDI/Spout/Syphon only) |
| Display | The target monitor (Display outputs only) |
The changes apply immediately, and you see the result in real time.
Duplicating Outputs
To make a similar output quickly:
- Right-click an existing output in the list
- Select Duplicate
- The new output appears with the same settings
- Reposition the copy and give it a new name
This helps when you set up several outputs with similar settings.
Deleting Outputs
To delete an output:
- Right-click the output in the list
- Select Delete
- Accept the confirmation prompt
Output Presets
FXCanvas saves the output settings as presets, separate from your shows. With presets you can:
- Use the same output setup in different shows
- Change between setups for different venues quickly
- Share output setups with other people
How Presets Work
- An output preset stores all your outputs. It does not store the render resolution
- FXCanvas saves the presets in your Documents/FXCanvas/Presets/Outputs folder
- FXCanvas restores the last preset automatically when it starts
- A show change does not change your output setup
Preset Dropdown
The preset controls are at the top of the Output Mapping Editor:
| Control | Function |
|---|---|
| Preset dropdown | Select one of the saved presets |
| Save | Save the changes to the current preset |
| Save As | Save as a new preset with a new name |
| Delete | Delete the current preset |
Creating a Preset
- Set up your outputs
- Click Save As
- Enter a descriptive name, for example "Club XYZ Setup" or "Dual NDI 1080p"
- Click Save
Loading a Preset
- Click the preset dropdown
- Select the preset that you want to load
- Your outputs update immediately
A preset load replaces every current output at once, and FXCanvas does not ask first. Save your changes before you load another preset.
Preset Tips
- Name presets by venue or purpose — "Main Stage", "Practice Room", "Streaming Setup"
- Make presets for different scenarios — One for rehearsal, one for performance
- Keep a simple default — A single full-canvas output is a good starting point
Enabling and Disabling Outputs
You have two levels of control over the output activity:
Master Enable (Per Output Type)
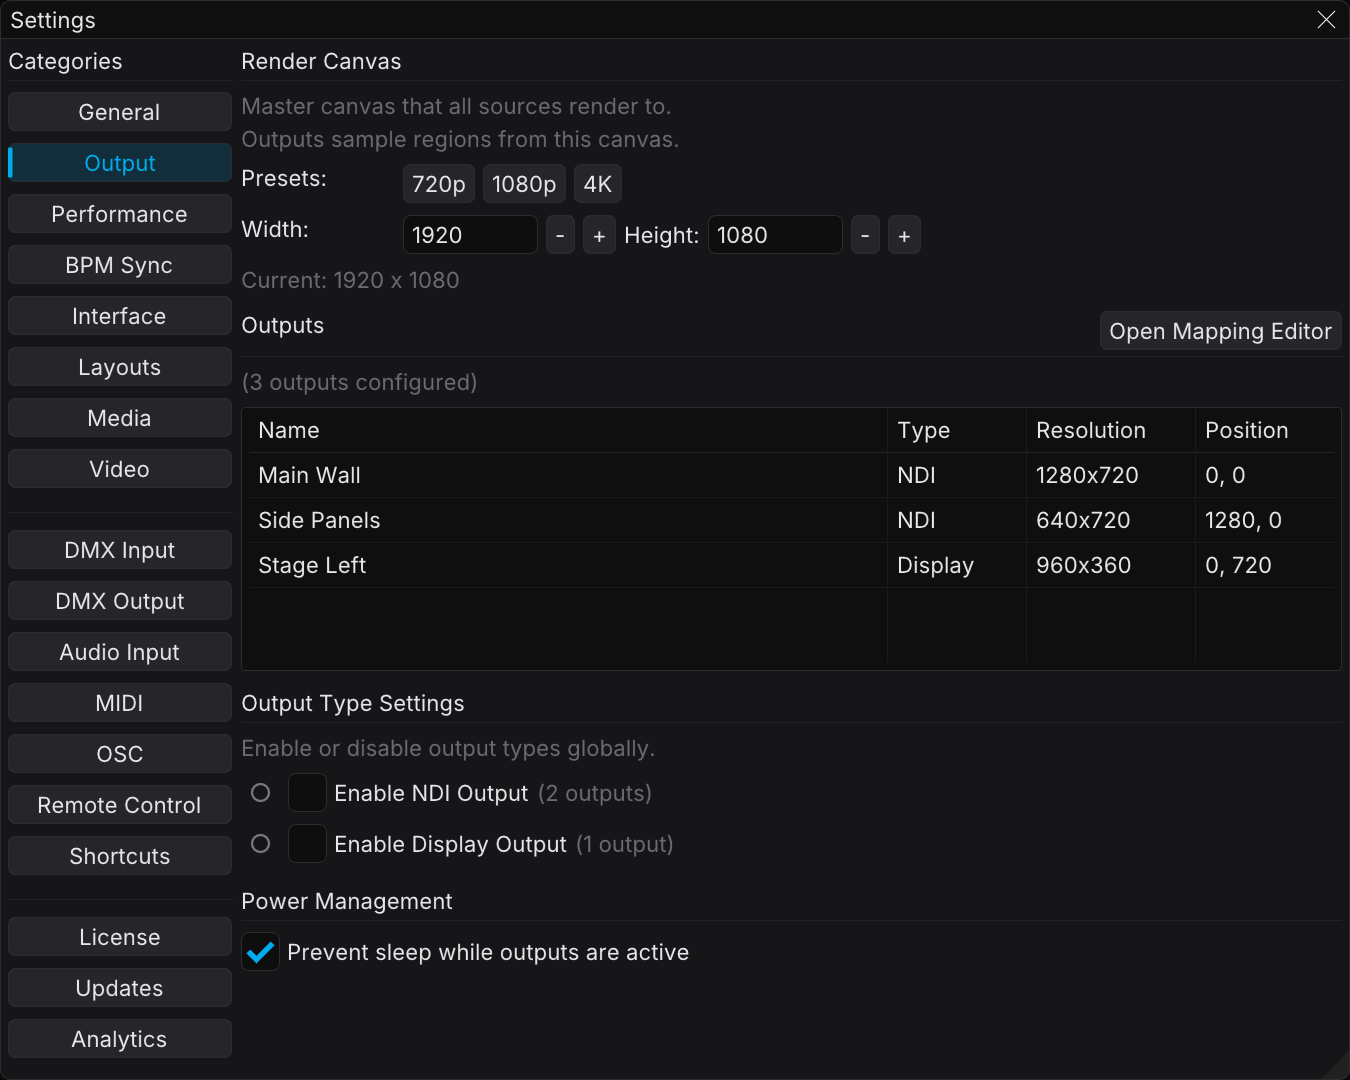
In Edit → Settings → Output you can enable or disable each output type globally. A toggle appears only for a type that has at least one configured output.
| Setting | Effect |
|---|---|
| Enable NDI Outputs | Every NDI output starts or stops the stream |
| Enable Spout Outputs | Every Spout output starts or stops the sharing |
| Enable Syphon Outputs | Every Syphon output starts or stops the sharing |
| Enable Display Outputs | Every Display window opens or closes |
A disabled output type uses no resources.
Status Bar Indicators
The video-outputs segment of the status bar counts your outputs by type, for example NDI: 2 outputs | Display: 1 output. One status dot leads the segment. The dot is green while any output streams, and gray while all of them are idle. With no outputs at all, the segment reads "No video outputs".
Hover a type to see the names of its outputs.
The segment counts NDI, Spout, and Display outputs. It does not count Syphon outputs. The segment is a read-out, so a click on it opens nothing. You can change the outputs in the Output Mapping editor or in Settings → Output.
To hide the segment, clear Video Outputs under View → Status Bar.
When to Disable Outputs
Disable outputs in these situations:
- Testing visuals — Disable every output to focus on the preview
- Saving resources — Disable the output types that you do not use
- Troubleshooting — Enable one type at a time to isolate an error
- Different workflows — Enable only what the current session needs
Output Settings
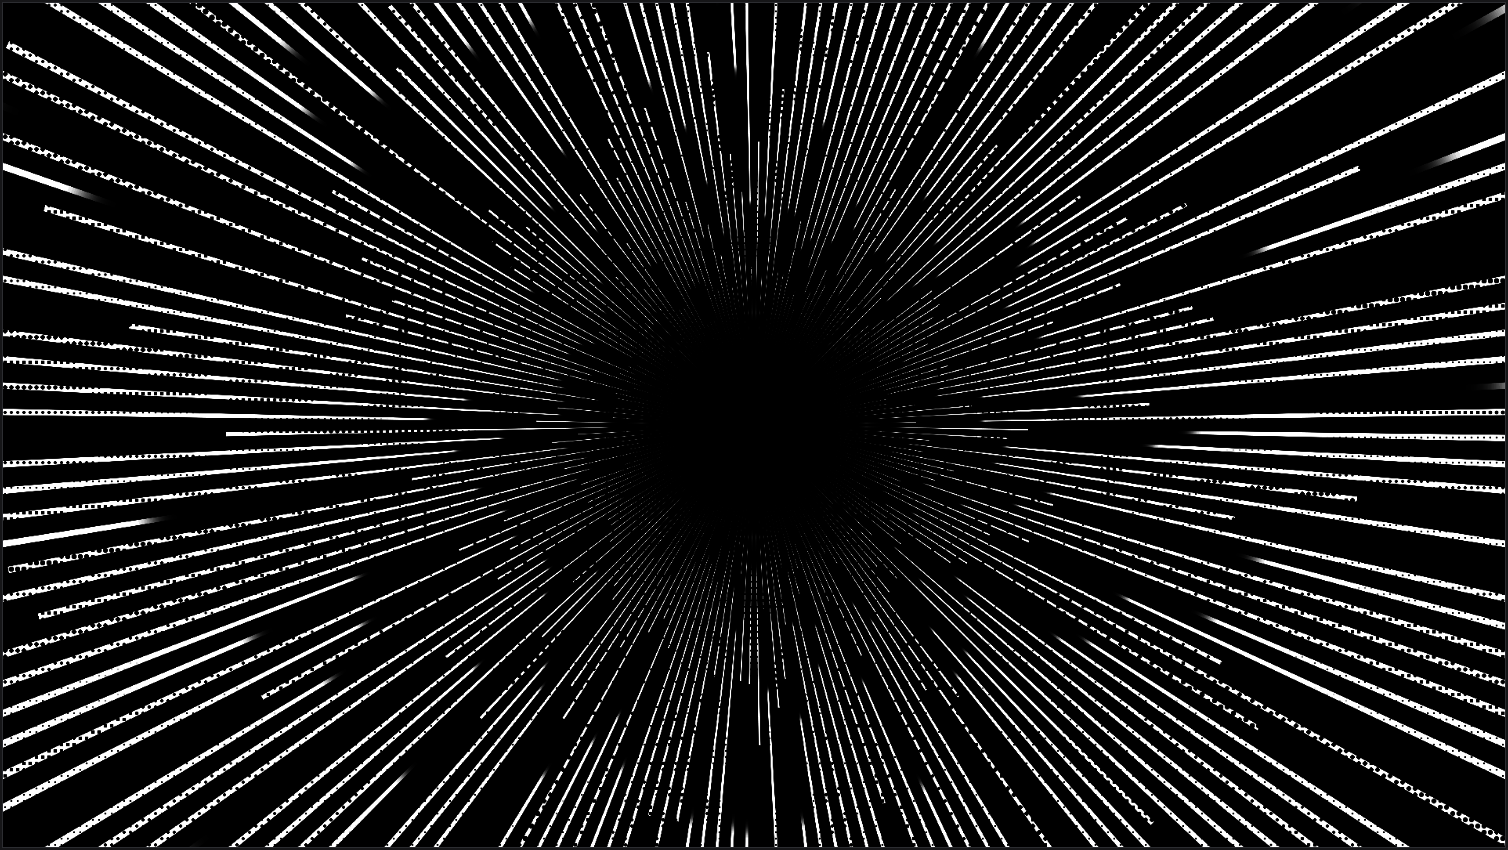
Open the output settings from the Edit → Settings → Output tab.
Render Canvas Settings
The render canvas is the master resolution for your visuals:
| Setting | Description |
|---|---|
| Preset buttons | Select 720p, 1080p, or 4K quickly |
| Width/Height | Custom resolution (128 to 16384 pixels) |
Higher resolutions need more GPU power. Start with 1080p. If your result needs more detail, increase the resolution. For pixel mapping from a lighting console, lower resolutions such as 500×500 often work better.
The 16384 limit is the format limit, not a recommendation. A 16384×16384 canvas needs approximately 1 GB of VRAM per buffer, and an effect chain uses several buffers. FXCanvas also clamps to the maximum texture size that your GPU reports. A card with a maximum of 8192 therefore caps at 8192.
Without a license the render canvas caps at 1280×720. The field accepts larger values but clamps them, and a notification gives the reason. A 1080p preset or a 4K preset therefore lands at 720p. See What requires a license.
Output Type Settings
Each output type has its own section:
NDI Outputs:
- Enable or disable all NDI streaming
- See the number of NDI outputs
Spout Outputs (Windows):
- Enable or disable all Spout sharing
- See the number of Spout outputs
Syphon Outputs (macOS):
- Enable or disable all Syphon sharing
- See the number of Syphon outputs
Display Outputs:
- Enable or disable all display windows
- See the number of Display outputs
Open Mapping Editor Button
Click Open Mapping Editor to start the visual editor for detailed output work.
Tips and Best Practices
Getting Started
Begin with one output at your render resolution. Add more outputs later.
Network Outputs (NDI)
- Use wired Ethernet — WiFi adds latency and drops frames
- Same network segment — Keep all NDI devices on the same subnet
- Descriptive names — Use names such as "Stage Left" or "LED Wall". Then you can identify the streams
- Firewall settings — NDI needs specific ports. A firewall can block the discovery
Local Sharing (Spout / Syphon)
- No setup necessary — Spout/Syphon sources appear automatically in compatible applications
- GPU matters — The performance depends on your graphics card
- Texture format — Enable alpha only for transparency
- Platform-specific — Spout on Windows, Syphon on macOS
Direct Output (Display)
- Dedicated GPU output — For the best performance, use a separate graphics output
- Match native resolution — Set the output resolution to the native resolution of your display
- Fullscreen mode — Use fullscreen for a clean output with no window borders
Performance
| Recommendation | Benefit |
|---|---|
| Disable unused output types | Saves CPU and GPU resources |
| Use appropriate resolutions | Higher is not always better |
| Limit simultaneous outputs | Each output adds overhead |
| Watch the frame rate | Read the performance in the status bar |
Troubleshooting
NDI output does not appear:
- Make sure that NDI is enabled in Settings
- Make sure that both computers are on the same network
- Disable the firewall temporarily as a test
- Start the NDI discovery again in the receiving application
Spout/Syphon output does not appear:
- Make sure that Spout (Windows) or Syphon (macOS) is enabled in Settings
- Make sure that the receiving application supports Spout/Syphon
- Make sure that both applications use the same GPU
Display output errors:
- Make sure that the correct monitor is selected
- Make sure that the display cables are connected
- Use windowed mode first, then fullscreen
Poor performance:
- Reduce the render resolution
- Disable the output types that you do not use
- Close the applications that you do not need
- Read the GPU usage
Related Topics
- Sources — The visual patterns that render to the output canvas
- Video Inputs — Use external video feeds as sources
- Video Playback — Play video and image files as sources
- Effects — Post-processing before the output
- DMX Output & Mapping — Drive real lighting fixtures from the render canvas
- Getting Started — An overview of the FXCanvas basics